- Home
- Create your own decking | Hardwood Discount UK
Create a decking
Making a decking can be done in different ways. Of course we have to start at the beginning. What kind of wood can be used for the decking? We advise to build a new decking out of tropical hardwood. All other non tropical types of wood will not last long. Tropical hardwood has the only sustainable properties. Furthermore, the wood has a fantastic appearance, it is strong, durable and very easy to process.
View our entire range of hardwood decking boards here
HOW THICK SHOULD THE DECKING BOARDS BE?
Usually decking boards are made from planks with a standard width of 14,0 cm. You can choose planks of different thicknesses, the planks are 2,1 cm or 2,5 cm thick. The choice of thickness also determines the durability and strength of the wood. Of course, a thinner plank is still a fine piece of wood. The thinner boards are very suitable for private applications, decks that are used less intensively. Will the decking be laid in a public area where there is a lot of weight and where wear and tear plays a major role? Then choose the thicker version of the decking boards.
With these decking boards, the result is beautiful because the screws are out of sight. The boards come with metal clips with screw holes. The sides of the boards have recesses so that the metal clips engage with the boards. It is very similar to click laminate. With these planks, you start in a corner of the decking with a whole plank. Here you do not screw the boards but the metal clips to the underlay. Use 2 screws per clip. A board should always be attached to two support beams; lengths shorter than 45 cm cannot be reused.
The centre-to-centre distance between supports is always 45 cm.
TOOLS REQUIRED TO BUILD A DECKING BOARD
- A long spirit level
- An iron mallet A heavy rubber hammer
- A drill including a bit holder
- A rake
- A shovel
- A Stanley knife
- A hand saw, but preferably a hand circular saw or circular saw table.
- 1 or 2 persons with light construction experience are desirable
STEP 1 TO BUILD A DECKING
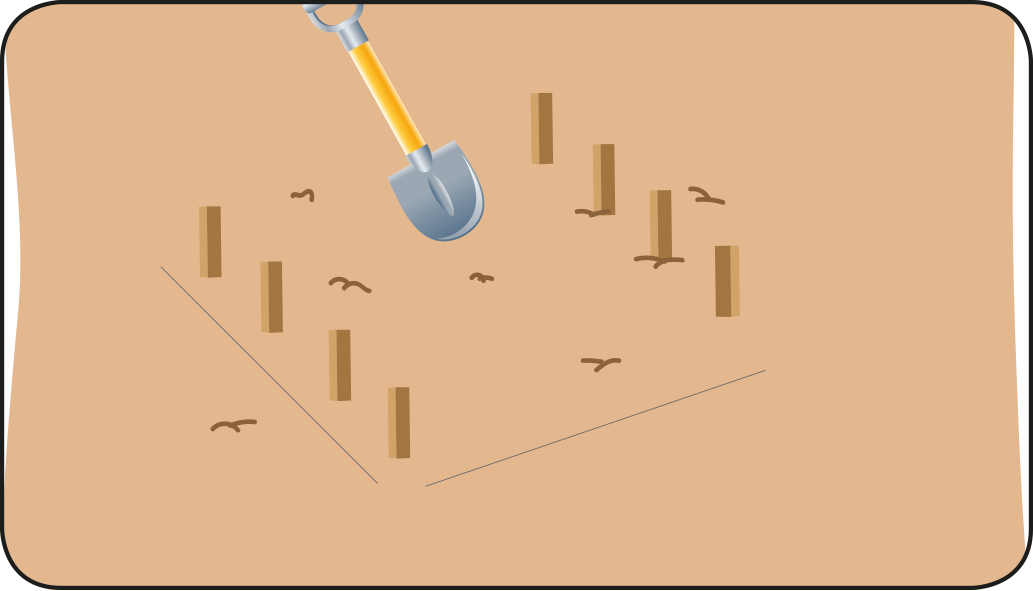
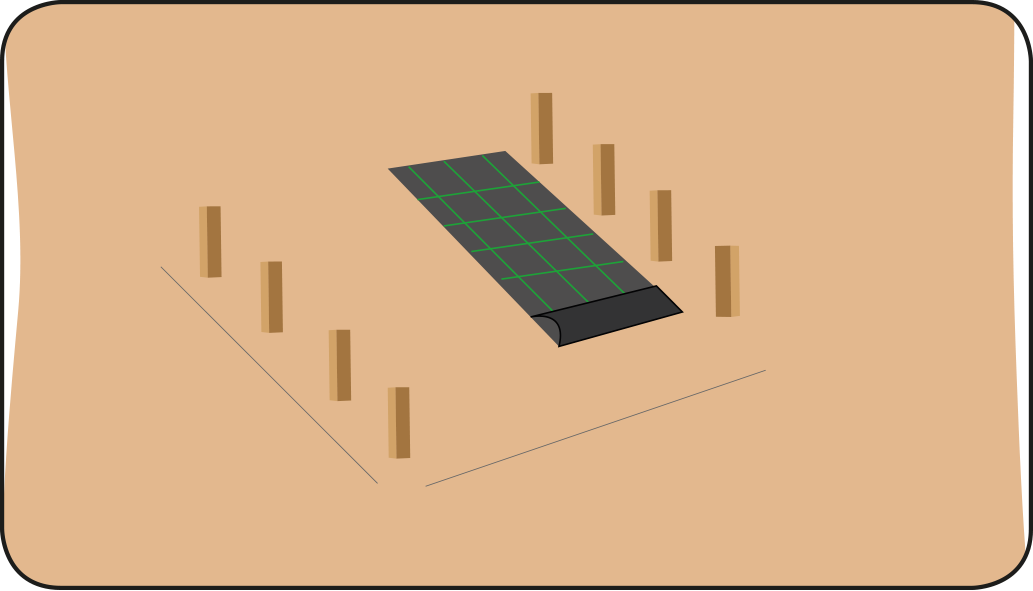
Determine where you want the decking. It can be easy to mark out the contours of the decking with small picket lines. Level the ground with a shovel and a rake. If the decking is more than 50 cm high, it is not necessary to level the ground. However, we recommend that you always level the ground in order to facilitate further construction. It is advisable to always make the decking 20 cm off the ground. This ensures that the bottom of the decking can dry out well in the autumn. Lay root canvas on the levelled ground so that no weeds can grow under the floor board.
STEP 2 TO BUILD A WOODEN DECKING, THE PICKET POLES AND UNDERLAY
First determine the direction of the decking you are going to build. Bear in mind that the lower beams should be placed at right angles under the decking. This means that when the floor boards are in line, the lower beam lies across.
Place the first lower beam on the ground. Place a stake on both sides of the lower beam and drive the stake into the ground. Then level the lower beam and screw it to the stake.
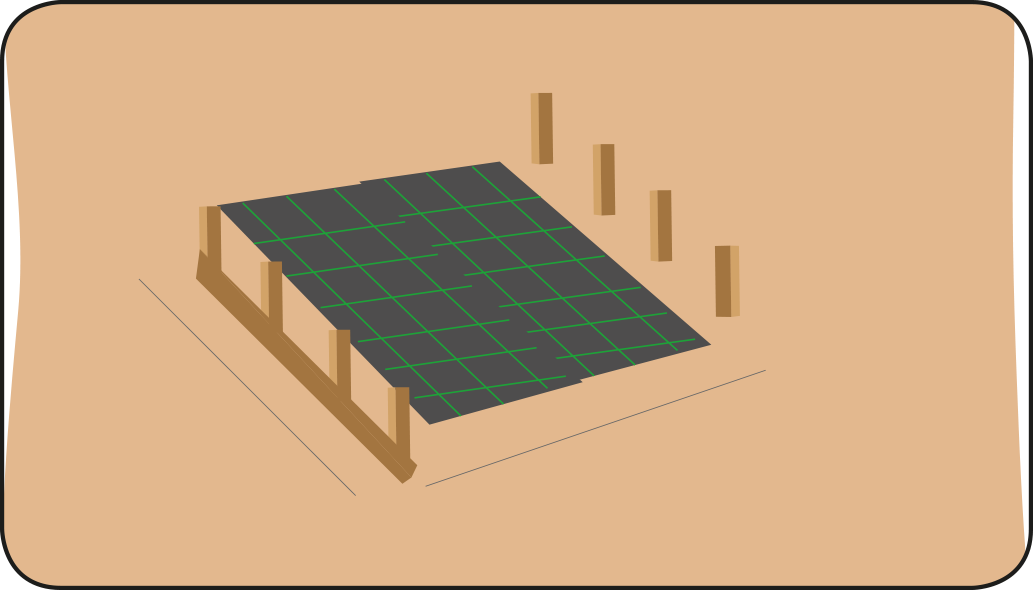
First floor beam - Decking
After this first step, determine the distance between the lower beams. This is always 40 cm. Then place the second lower beam on the ground and measure the distance to the first lower beam. Drive the second lower beam again into the ground on both sides. Adjust the level of this second lower beam and also in relation to the first lower beam. This ensures that the deck will eventually be straight and level.
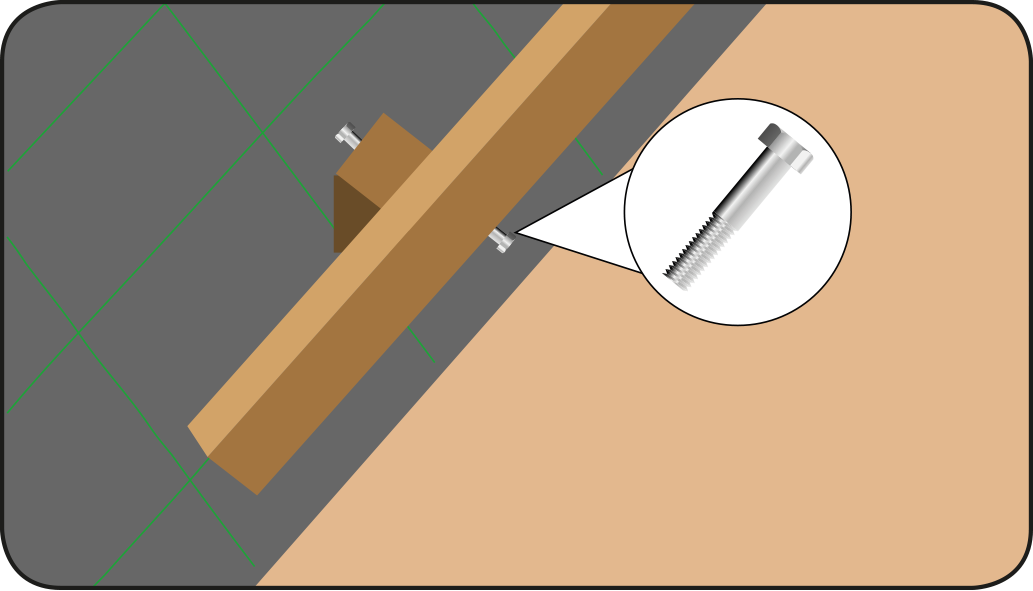
After the first two lower beams, you can proceed with the installation of the picket stakes. Drive a stake into the ground every metre and secure it to the sub-structure with two screws.
STEP 3 INSTALL THE DECK ON THE JOISTS
At Hardwood Discount we supply decking boards with which you can build the terrace (e.g. decking boards). This determines the procedure for making the deck. When laying the decking boards always make sure that you leave a space of 1.0 cm between any walls so that the wood still has room to work.
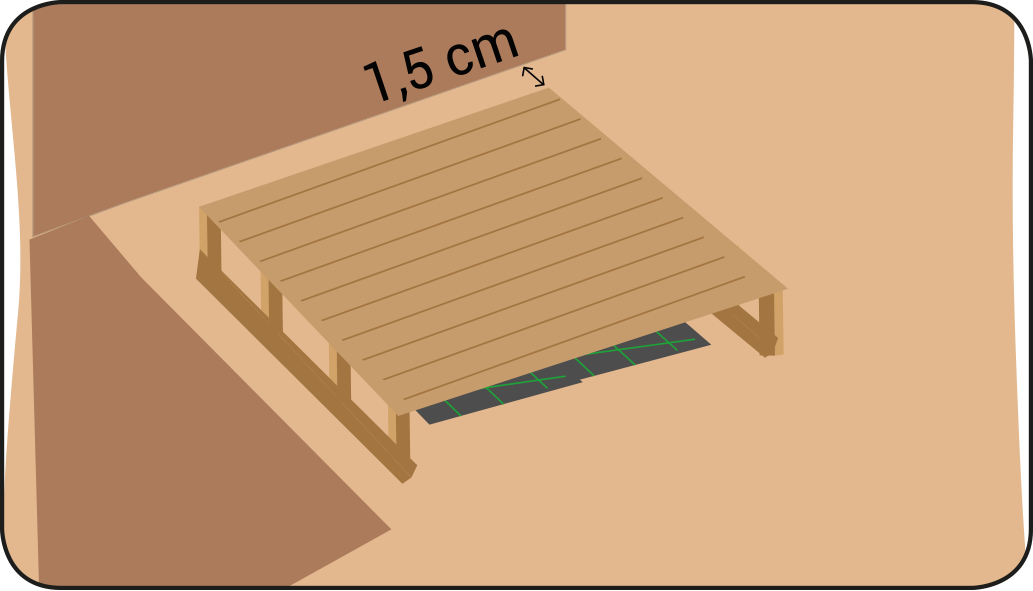
Do not forget to clamp the floor boards at the ends. If the boards can move, especially lengthwise, there is always a risk of the decking (and the click system) coming apart. You can prevent this by screwing several screws obliquely into the rebate at the end of the plank. This will keep the boards securely clamped. Or place an edge trim of wood around the decking. Of course, you can also use a concrete edge or wall as an edge trim or bumper. All in all, the decking should be well clamped on four sides to prevent the natural deformation of the wood. You should also ensure that a decking board has no overhang. The end of the decking board should meet a support beam. If you let the boards protrude and do not place an edge trim, there is always a risk that the boards will deform.
INSTALLATION OF THE DECKING
The result is beautiful because the screws are out of sight. The boards have metal clips with screw holes. There are grooves in the side of the boards so that the metal clips can be fitted into the boards. It is easy to compare with click laminate. With these boards you start in a corner of the decking with a whole board. Do not screw the boards but the metal clips to the underlay. Use 2 screws per clip.
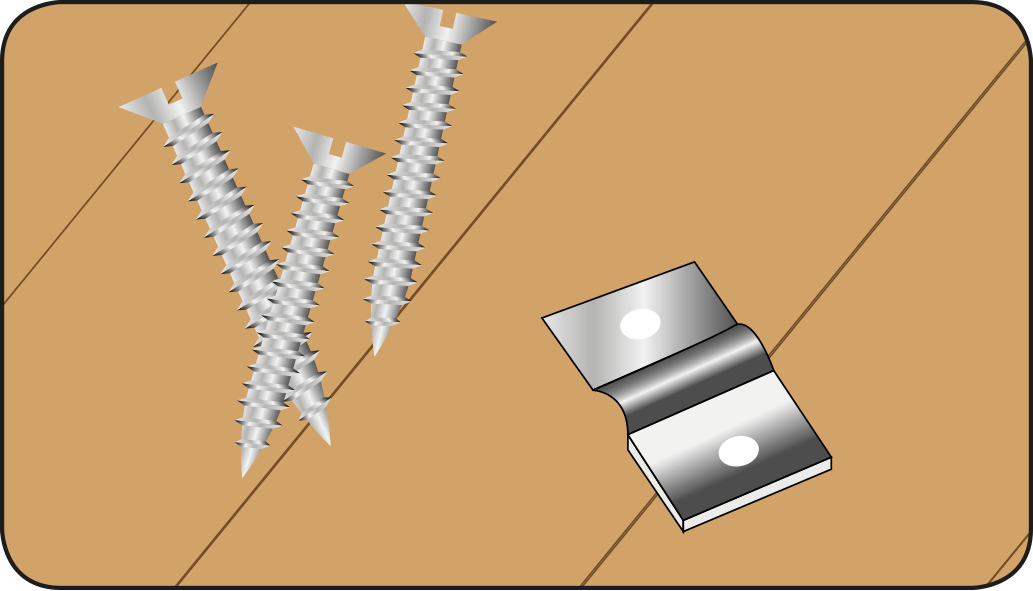
With these decking boards, the result is beautiful because the screws are out of sight. The boards come with metal clips with screw holes. The sides of the boards have recesses so that the metal clips engage with the boards. It is very similar to click laminate. With these planks, you start in a corner of the decking with a whole plank. Here you do not screw the boards but the metal clips to the underlay. Use 2 screws per clip. A board should always be attached to two support beams; lengths shorter than 45 cm cannot be reused. The centre-to-centre distance between supports is always 45 cm.
STEP 4 FINISHING THE TERRACE
When you reach the end of your decking, saw off the board. If the piece you saw off is 40 cm. or longer, then start with this piece on the next track. If it is shorter, you can consider it as waste and maybe make a nice planter or something else out of it. Any excessively long beams or planks can be sawn off as a very last step, and the sides can be finished off with a standing or edge board.
After you have screwed down all the boards and sawed them off, one last task remains - sweeping away the splinters on the deck. You are now ready to put the garden furniture on the decking. You can also extend it. For example, you can build a shed or a roof.